Die-cut sticker
Start with automatic shape, offset and corner radius.
- Shape
- Auto
- Offset
- Auto
- Corner radius
- Auto
Cut paths, not corners.
7 days free. No card or account needed. macOS and Windows.
Now on Adobe ExchangeBuy and install from Adobe Creative CloudOpen your artwork in Illustrator and use the CreateCutline panel.
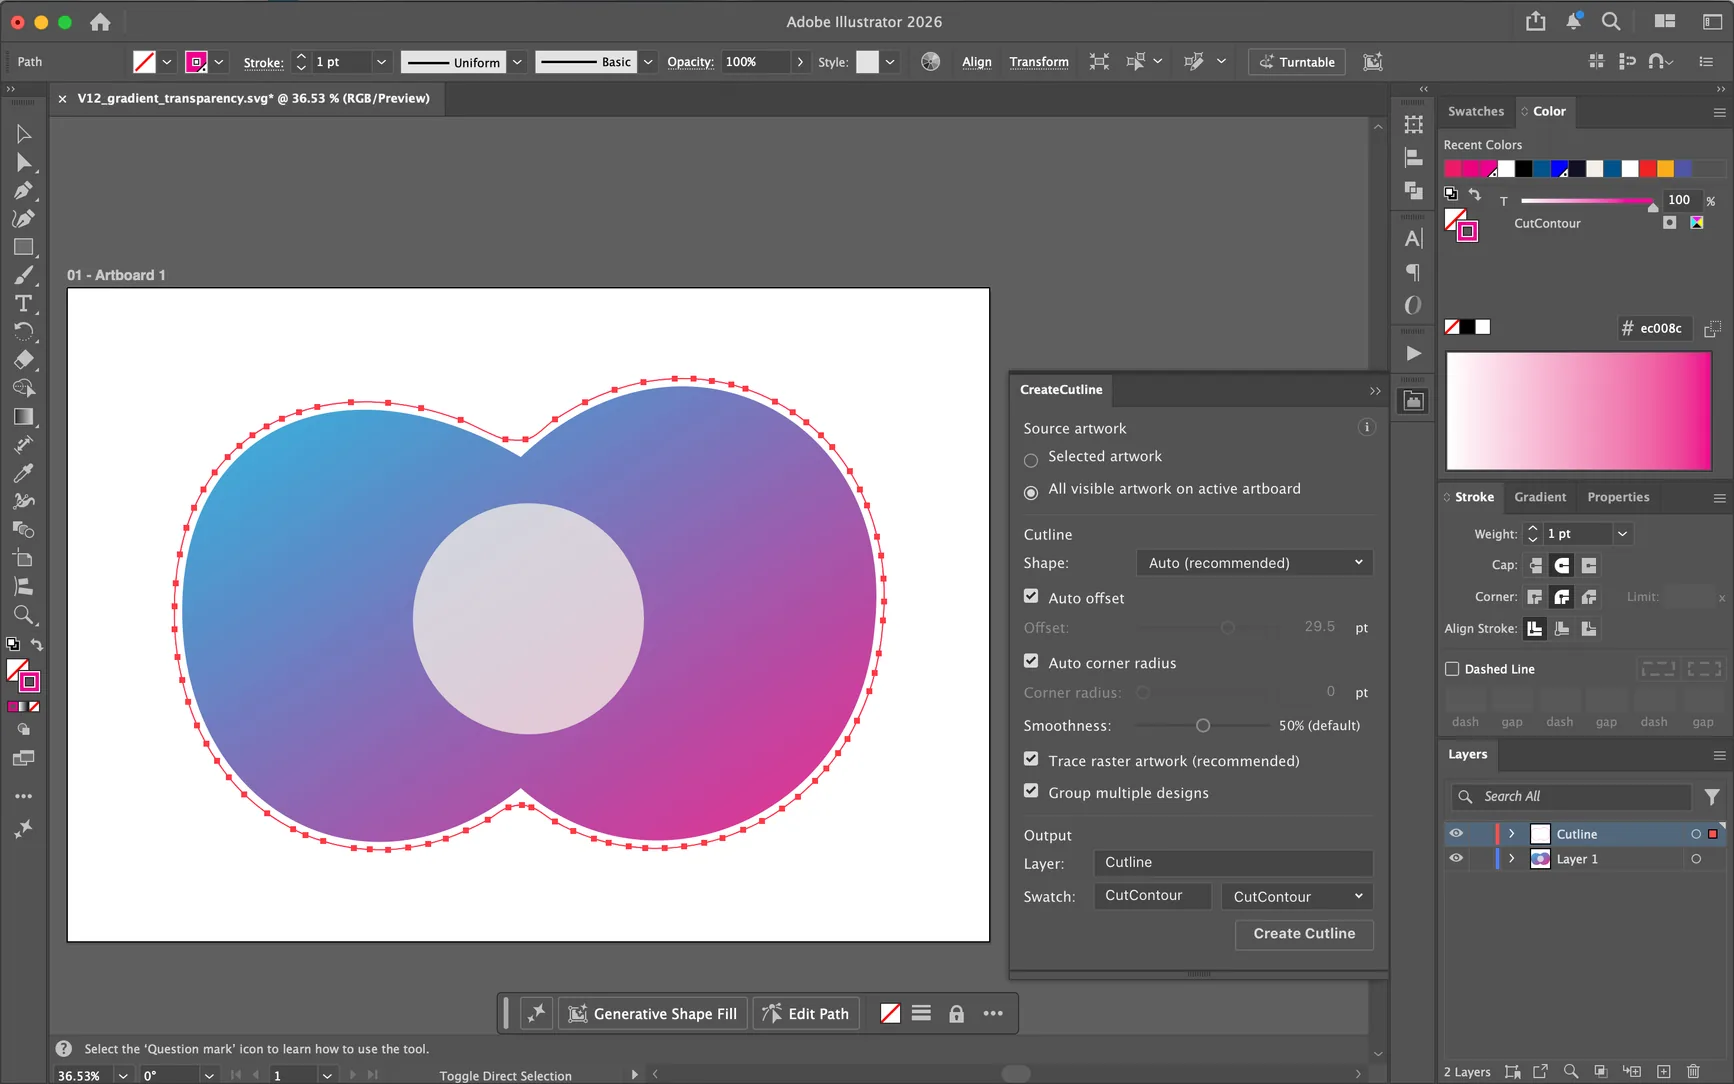
Select the pieces you want to include. With nothing selected, CreateCutline uses the visible artwork on the active artboard.
Start with automatic shape, offset and corner radius. Leave smoothness at its default or adjust it for the job.
Press Create Cutline. The path is added to a separate Cutline layer with a CutContour spot swatch.
Use your usual print-and-cut workflow, with the swatch name your RIP expects.
Use Auto to start, then adjust the shape, offset, corner radius or smoothness. For a sheet of separate stickers, turn off Group multiple designs. You can also set the output layer and swatch names to match your workflow.
Use selected artwork or all visible artwork on the active artboard.
Use Auto, or choose Contour, Rectangle / Square, Circle or Oval.
Set the distance between the artwork and the cutline. Negative values move the path inward.
Use automatic rounding or enter a radius for rectangles and squares.
Adjust how closely the path follows small details in the artwork.
Trace the visible artwork in a placed image.
Turn off to give separate designs their own cutlines. On by default.
Enter the layer and spot swatch names your workflow requires.
These are starting points. Adjust the values for your artwork and workflow.
Start with automatic shape, offset and corner radius.
Move the cut path 0.04 in inside the artwork edge.
Use a rectangular path inside the bleed and set the corner radius.
Choose Circle and set the border width with Offset.
Turn off Group multiple designs to create separate cutlines.
Enable raster tracing and adjust smoothness for the image.
Enter the spot swatch name your RIP expects.
Select the artwork to cut and leave the rest of the artboard in place.
CreateCutline can trace raster artwork and choose the shape, offset and corner radius automatically. You can also set those controls yourself.
Create cutlines from vector artwork or placed images, including PNGs and JPGs.
PNG · JPG
Auto chooses a contour or a rectangle based on the artwork. You can choose Contour, Rectangle / Square, Circle or Oval yourself.
Contour or rectangle
The base offset is 1% of the artwork's longest side, with a minimum of 5 pt and a maximum of 18 pt. Separated pieces can receive extra space. Enter a value for an exact offset.
1% of longest side
For rectangular cutlines, automatic rounding follows the artwork's corners and adds the offset. You can also enter a radius.
Matched
Enter a negative offset to move the cut path inside the artwork edge.
Inward
Adjust how much detail the cut path follows. Lower settings retain more detail; higher settings simplify the contour.
Slider
These examples use the default settings. The magenta line is the path generated by the plug-in.

One cutline around the mascot.

An offset around the silhouette.

A cutline traced from placed raster artwork.

A cutline around the outer artwork, with the internal detail preserved.
All trademarks are the property of their respective owners, shown for demonstration only.
A licence key for your trial, or the same plug-in on Adobe Exchange. Choose on the next page.
Download the free trialUse all features free for 7 days. A licence costs $20 for one computer, with no subscription.
No card or account needed for the trial.
Questions about your workflow? support@createcutline.com